Frequently AskedQuestions
When should I repair my pool equipment versus replace it?
If your equipment is relatively new and the issue is minor, a repair is often the most cost-effective option. However, older equipment that breaks down frequently, runs inefficiently, or is no longer supported by the manufacturer is usually better replaced. Our technicians can evaluate your Hayward equipment and recommend the best solution for performance and long-term value.
What are the benefits of upgrading to new pool equipment?
Upgrading to newer Hayward equipment can improve energy efficiency, water quality, and overall pool performance. Modern pumps, heaters, and automation systems often run quieter, use less energy, and offer smart controls—saving money while making pool ownership easier and more enjoyable
Can you help me choose the right Hayward equipment for my pool?
Every pool is different, so we assess your pool size, usage, and existing setup before recommending equipment. Our team helps you select the right pumps, filters, heaters, or automation systems to ensure optimal performance, efficiency, and long-term reliability.
general questions
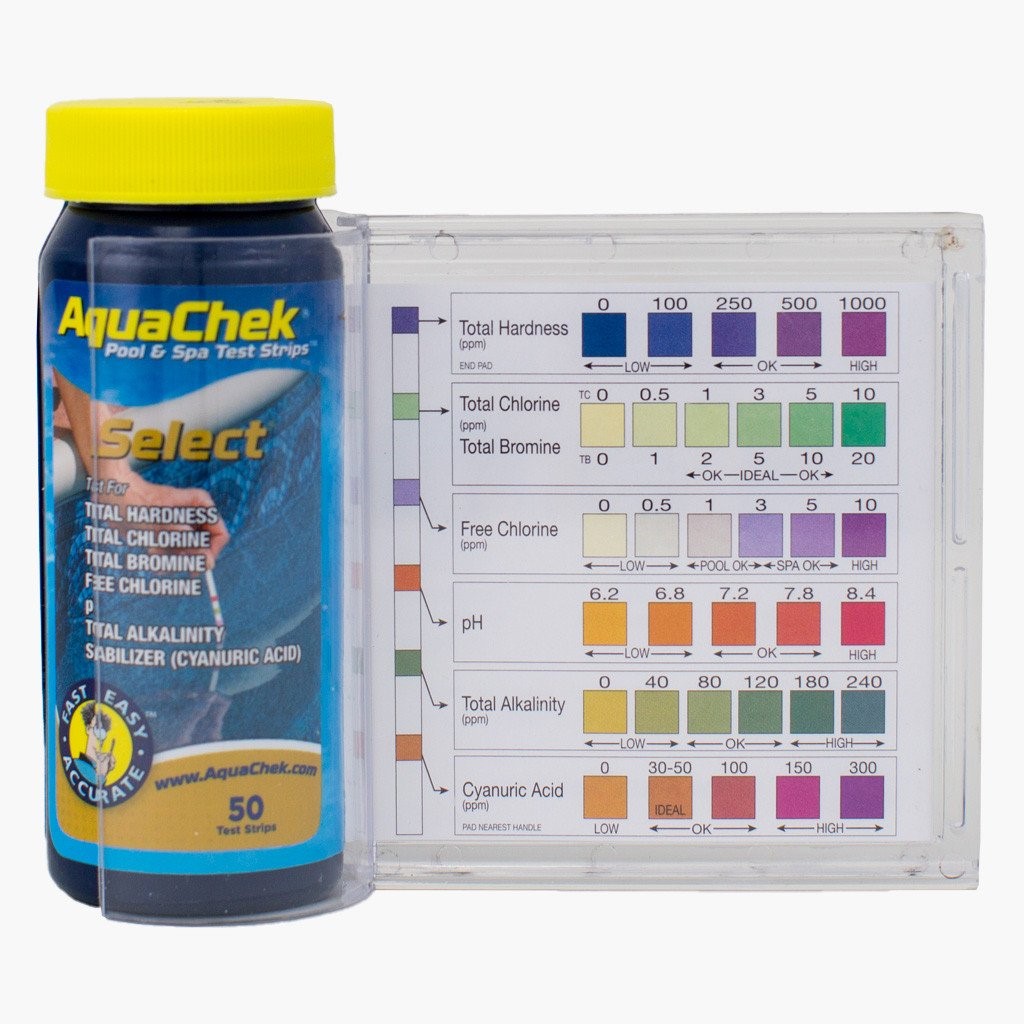
water chemistry
Liners
covers
filters
Automation
pumps
heat pumps
gas heater
salt systems
Lights
UV2
Coming soon…
Contact Us
admin@excelpoolservice.com
732-905-1300
5420 HWY 9 S. Howell NJ 07731
M-F: 9am-5pm, S-S: Closed
Have More Questions?
Excel Pool Service
Howell , NJ 07731
Equipment
Heater & Heat Pumps
Filters
Pump Motor
Lights
Automation Sanitization
DHL
Services
Liner Replacements
Safety Covers
Warranty
Openings and Closings
Misc Services
Phone
(732) 905-1300
Admin@excelpoolservice.com